
Prawn Curry Recipe | Prawn Masala Curry | Golda Chingri Malaikari Recipe


INGREDIENTS:-
1) Ginger paste 2 tbsp
2) Garlic paste ½  tbsp
3) 1 cup Chopped tomatos
4) Green Chilli
5) Chopped Onion
6) Mustard Paste
7) Fresh prawn
8) Mustard oil
9) Salt 2 tbsp
10) Turmeric powder 1 ½  tbsp
11) Red chilli powder 1 tbsp
12) Garam Masala ½  tbsp
11) Sugar ½ tbsp (Optional)


MAKING PROCESS:-

1)      Take fresh prawn and mix it with turmeric powder and some salt and put it 5 minutes.


2)      Take a vessel and add  1 cup mustered oil and heat it.


3)      When the oil become hot then add pron one by one and fry it on medium flame until prawn become brown color.  


4)      After that put  it in a plate and add 1 cup chopped onion , chopped green chilli and ½  tbsp garlic paste and 2 tbsp ginger paste and mix it very well.


5)      Now add chopped tomatoes and add ginger and mix it well.


6)      After that add all masala with mustard paste and mix it .


7)      Then add Prawn one by one and mix it.


8)      Now add 2 cups plain water.
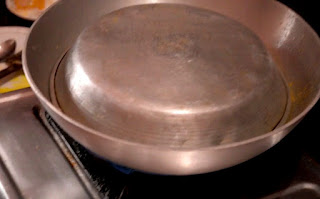


9)      After that  cover it with a pan on low flame.  Put it 10 minutes until it will properly cooked.


10)   Now your prawn curry is ready for serve.

Comments

Popular posts from this blog

Clap On Off Switch Circuit Using Arduino

  Arduino Clap LED program #define MicAO 8 int ledPin = 13; int clap = 0; long detection_range_start = 0; long detection_range = 0; boolean status_lights = false; void setup() {   pinMode(MicAO, INPUT);   pinMode(ledPin,OUTPUT);   } void loop() { int status_MicAO = digitalRead(MicAO); if (status_MicAO == 0) { if (clap == 0) { detection_range_start = detection_range = millis(); clap++; } else if (clap > 0 && millis()-detection_range >= 50) { detection_range = millis(); clap++; } } if (millis()-detection_range_start >= 400) { if (clap == 2) { if (!status_lights) { status_lights = true; digitalWrite(ledPin, HIGH); } else if (status_lights) { status_lights = false; digitalWrite(ledPin, LOW); } } clap = 0; } }

Bluetooth Robot Car Using Arduino Project Step By Step

Bluetooth Controlled Robot Car Using Arduino Bluetooth Controlled Robot Car Using Arduino Project using LM298n motor deriver and hc-05 bluetooth module step by step tutorial. Code Download :- Click Here Arduino bluetooth controller app Arduino bluetooth controller App

IOT Based Water Level Indicator Project Using Esp32 And Ultrasonic Sensor

  Water Level Indicator Project Using ESP32   Water Level Indicator with Alarm on Tank Full.   IoT Wi-Fi smart water level indicator for tanks with mobile app control . 📟 OLED Display (0.96" I2C SSD1306)   OLED Pin         ESP32 Pin VCC                     3.3V GND                     GND SDA                    GPIO 21 SCL                      GPIO 22     🔔 BUZZER   Buzzer Pin        ESP32 Pin   +           GPIO 26 -            GND         Each LED connects to an ESP32 GPIO pin via a current-limiting resistor.   ...